Text by Jeremy Cuff/www.ja-universe.com
Photography by Jeremy & Amanda Cuff/www.ja-universe.com
Malapascua is a laid back and pleasant island located just off the northern tip of Cebu in the Philippines. To date, its presence on the global diving map can largely be attributed to the local Thresher Shark encounters which can be reliably seen on dives at Monad Shoal, making the area unique for that reason alone. But there’s actually quite a lot more to the area than the sharks, with a wide variety of dive sites to explore and photograph.
Around the island, there’s some very interesting “muck” diving at sites such as Ka Ostling and Bantigues (or Bantigi as it’s sometimes spelt) where all manner of weird and interesting critters can be found, though you sometimes have to look hard to find them.
For fans of spectacular underwater scenery there’s nearby Gato and Calanggaman Islands which are regularly visited by the island’s dive operations, such as Thresher Shark Divers who hosted my visit. Gato Island, for example, has something of everything, including caves, overhangs, drop offs, rubble slopes, abundant marine life, coral gardens and walls festooned with soft corals.
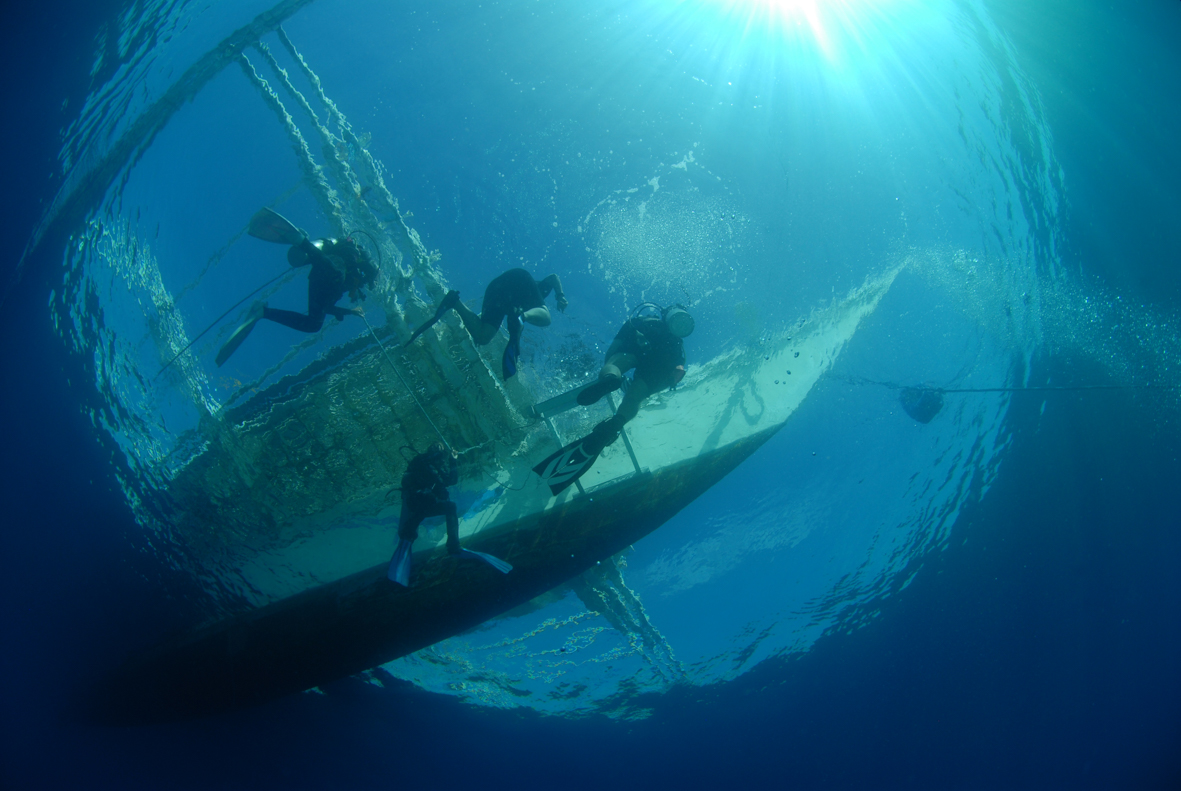
There’s also a choice of more “conventional” reef sites, some in sheltered areas such as Lighthouse and others that are more prone to current such as North Point and Bugtong Bato. The sites that experience regular current are often prolific in corals, especially soft coral. And there’s even a couple of wrecks for “wreckies” to enjoy.
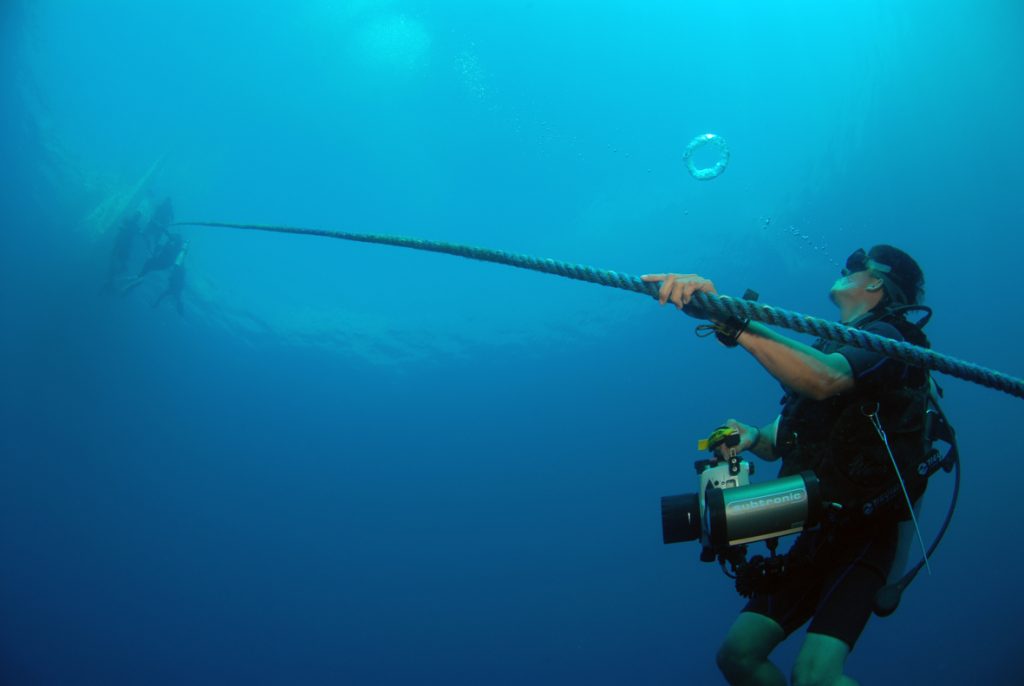
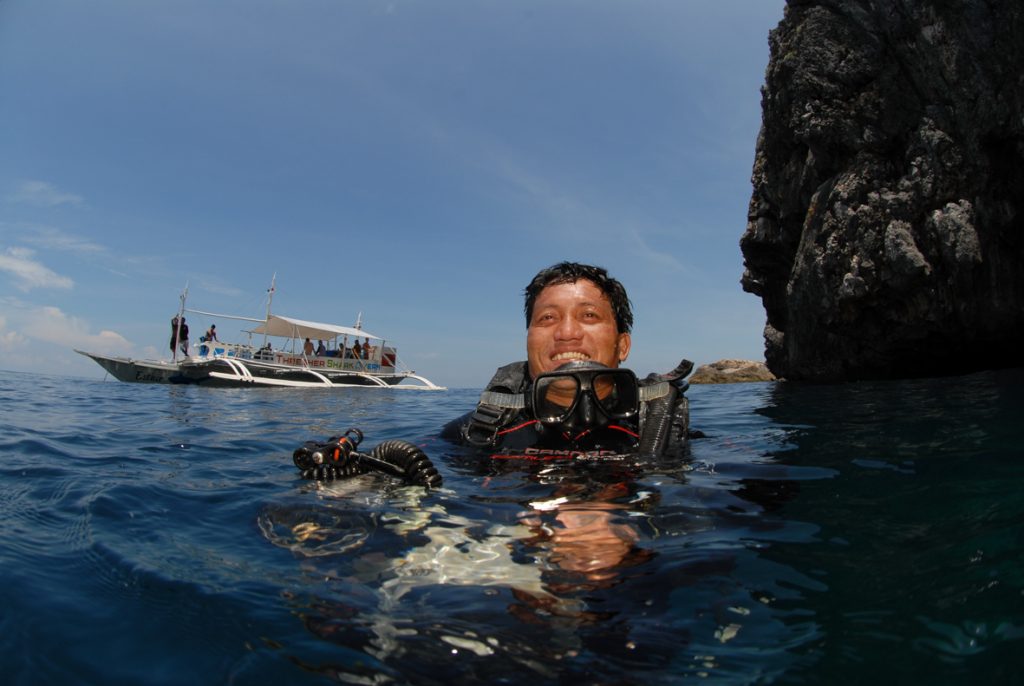
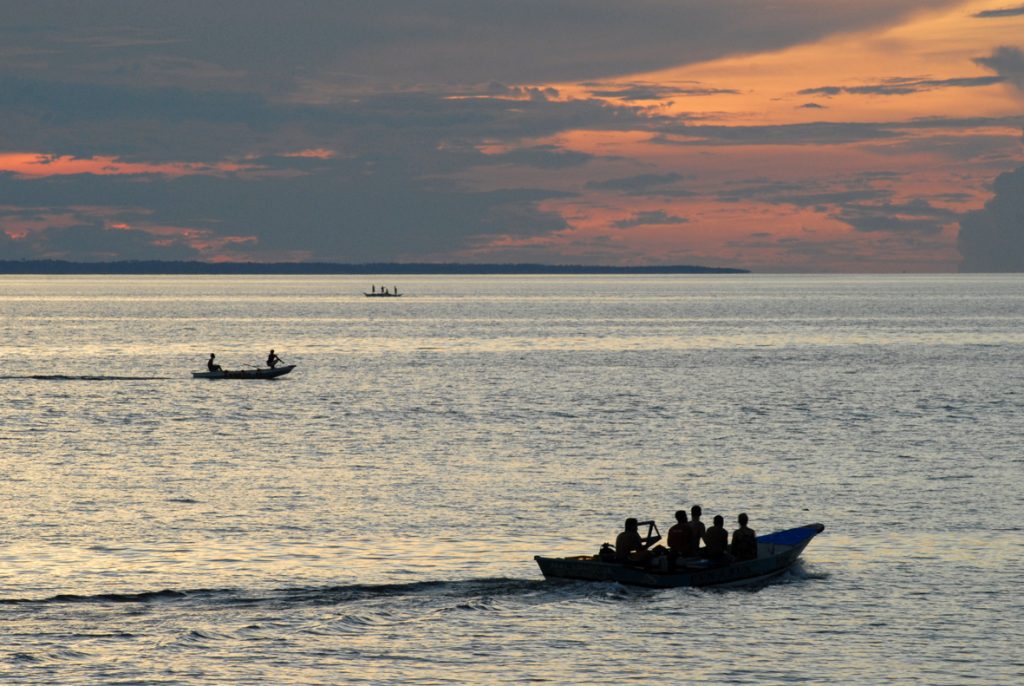
Though shore diving is possible, the vast majority of the diving is accessed by boat, most likely using a characteristic “bangka” style vessel which are common throughout the Philippines.
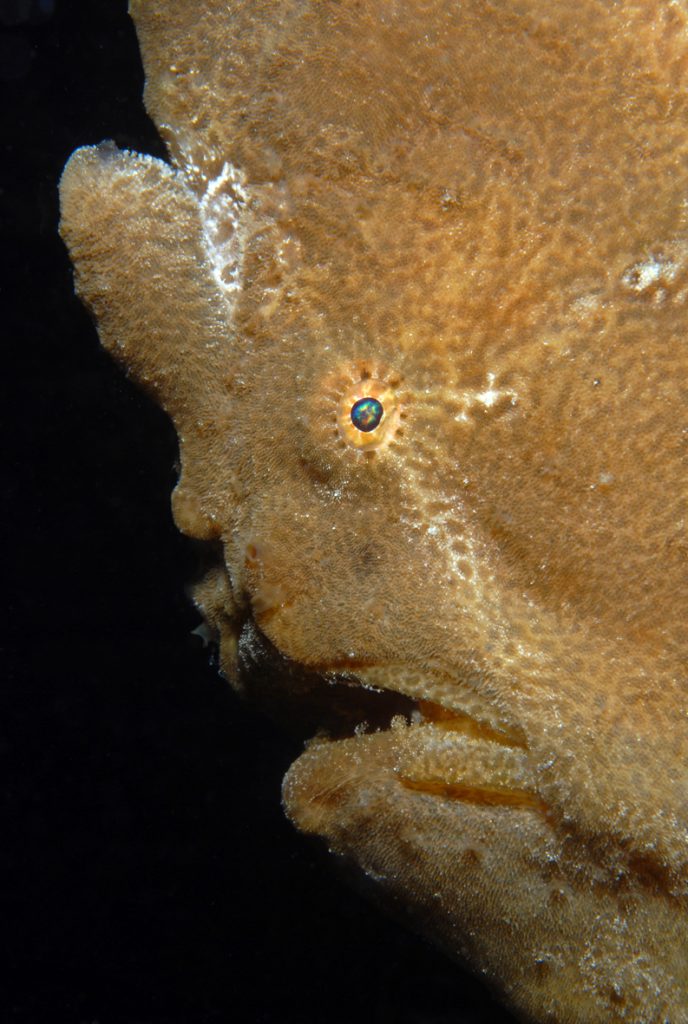
To help maximise the photographic potential of each dive site, a good local dive guide is always a big help, so it’s worth seeking out the most knowledgeable individuals when visiting. My dive guide “JN”, who works for the Thresher Shark Divers team knew the sites extremely well and was very adept at finding things on the dives such as frogfish, seahorses, tiny shrimps and crabs. Without his help I would’ve missed many of the fascinating and cryptic critters that Malapascua has to offer.

Malapascua Facts
Where: Malapascua Island is located off the northern tip of Cebu in the Philippines.
Language: Though there are many languages in use across the Philippines, for the purposes of simplicity it can be narrowed down to Filipino and English. English is widely spoken and understood on Malapascua. Other languages such as German may also be understood to a lesser degree.
Currency: The national currency is the Philippines Peso. Other currencies such as US Dollars and UK Pounds may be accepted at some hotels, restaurants and dive centres.
Time Zone: Philippine Standard Time
Water Temperature: Generally very warm – in the region of 25 – 30+ degrees Celsius.
Air Temperature: Generally very warm – usually in the region of 27 – 35 degrees Celsius.
Diving Experience Level: Varied – some sites are excellent for inexperienced divers, whereas others would be better suited to more seasoned divers. Some sites offer shallow and sheltered diving, whereas other sites are deeper and washed by currents, some of which can be strong.
Photography Experience Level: There’s subjects here to suit underwater photographers of all levels.
Underwater Photography in Malapascua
Subjects
Malapascua is most definitely a “combination destination” in that it offers both wide-angle and macro photographic opportunities.
It’s best known for the unique Thresher Shark encounters at Monad Shoal but there are many other good photographic opportunities, even if the Threshers are timid.
The area is also known for Manta Rays, with the best place to see them being at a cleaning station at Monad Shoal, with Mobula Rays also being encountered periodically. Hammerheads can also be regularly seen in the December to May period, with April being historically the best month (though nothing is “guaranteed” in diving).
For photographers looking to shoot underwater vistas, Gato Island offers some great opportunities with caves, ledges and walls festooned with soft corals. Calanggaman Island also offers great underwater scenery with exciting drop offs that are sometimes patrolled by pelagics, though I wasn’t able to get out there during my visit.
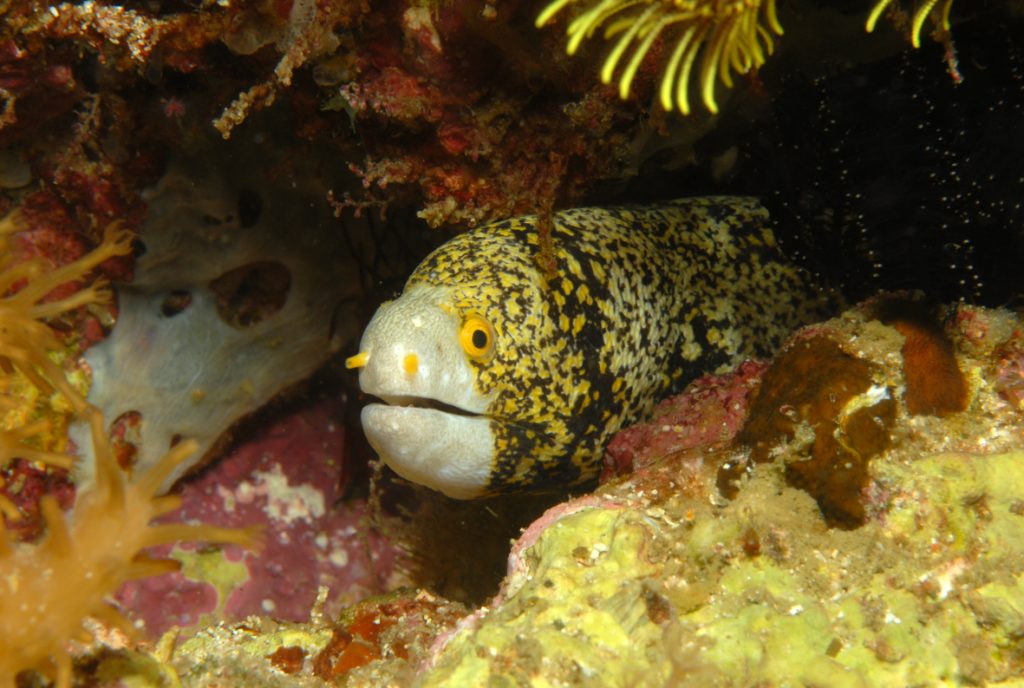
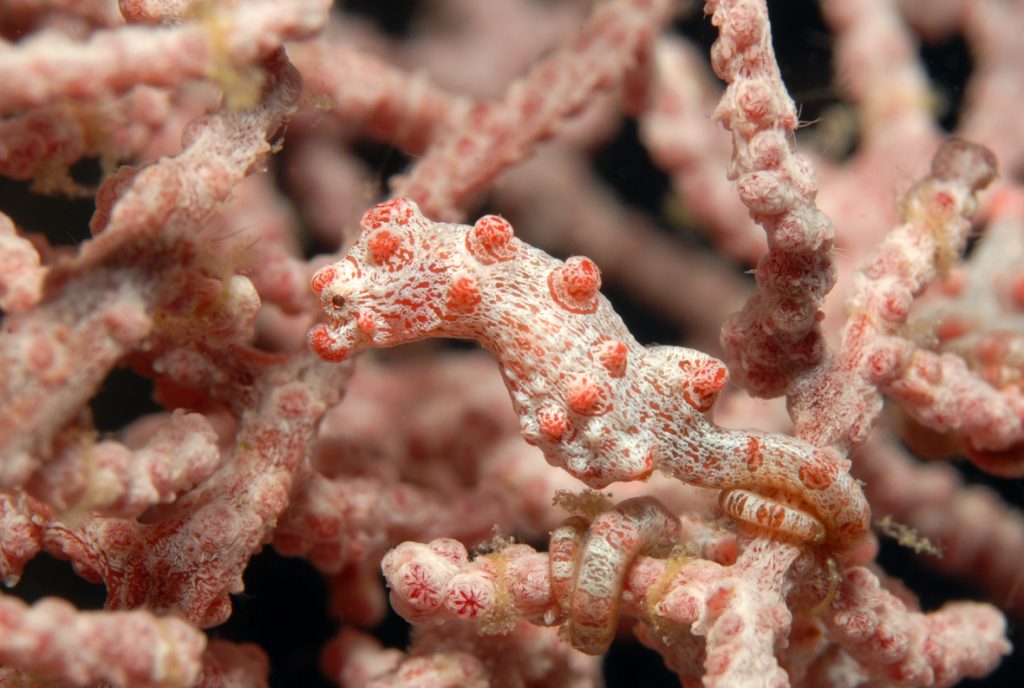
Macro photographers will certainly find a great variety of subjects around Malapascua, whether shooting on the “muck” sites or the reef sites. For example, there’s plenty of seahorses, particularly at Lighthouse, as well as Pygmy Seahorses at the Deep Rock site.
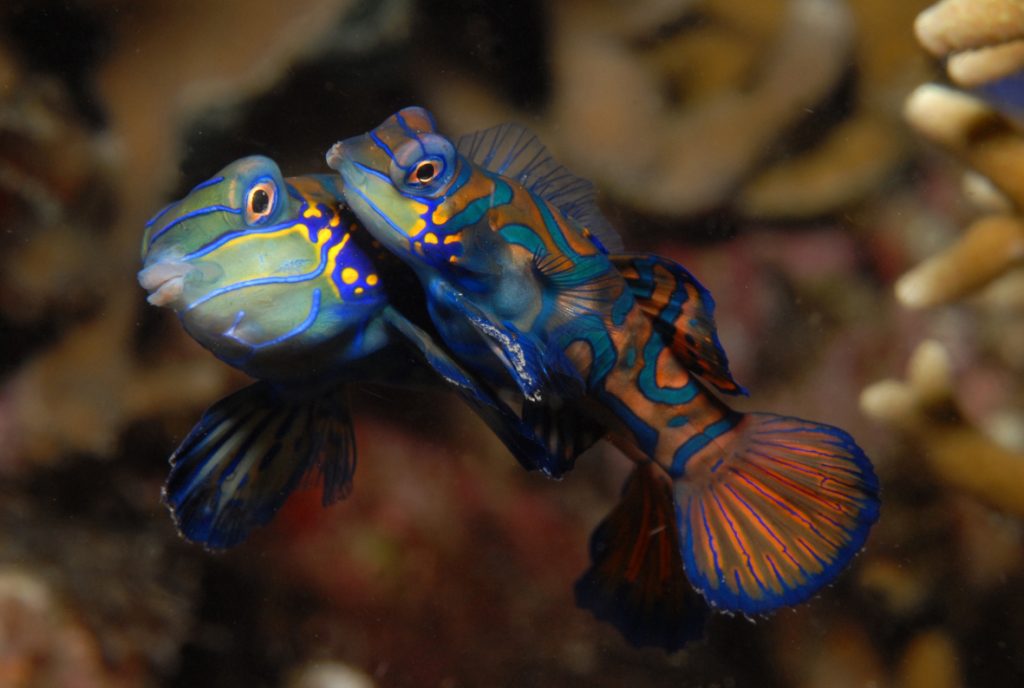
Mandarin Fish give photographers a chance to capture the classic mating shot, with other popular subjects such as frogfish, pipefish, scorpionfish, crabs, shrimps, nudibranchs and cuttlefish being fairly common. Make sure that you pair up with a good local dive guide if you want to find the subjects.
List of wide-angle subjects:
– Thresher Sharks
– Hammerhead Sharks
– Manta Rays
– Mobula Rays
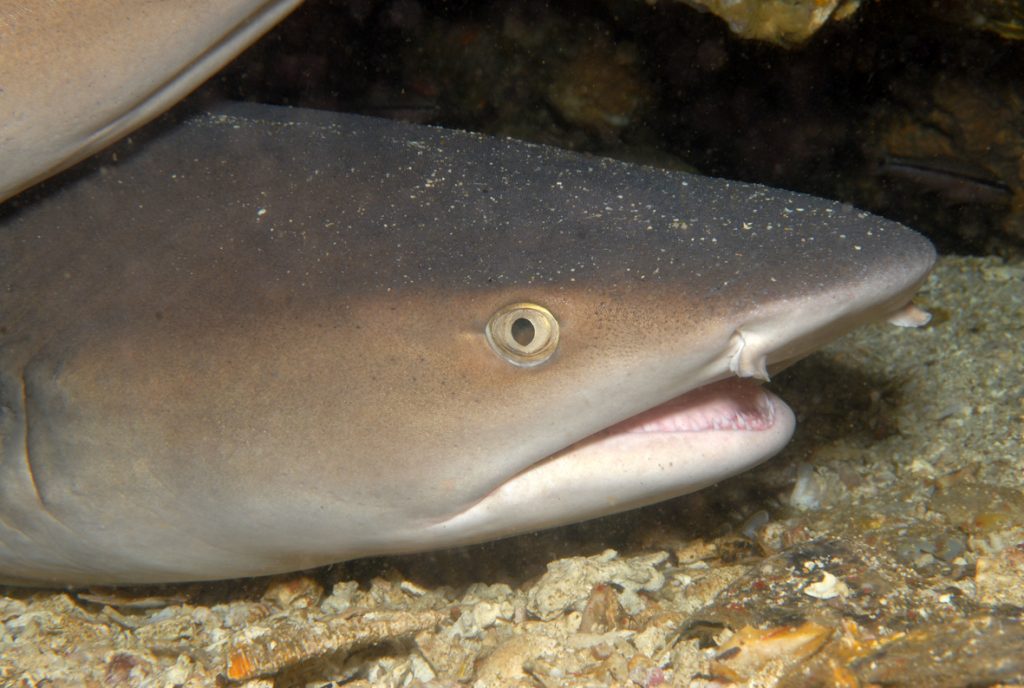
– White Tip Reef Sharks
– Caves & Archways
– Walls & Drop Offs
– Soft Corals
– Hard Corals
– Diver Modeling
– Wrecks
List of macro subjects
- Frogfish
- Seahorses (including Pygmy Seahorses)
- Pipefish
- Mandarin Fish
- Bamboo Sharks
- Striped Catfish
- Shrimp Fish (Razor Fish)
- Many species of Crab
- Cuttlefish
- Pufferfish
- Many species of Shrimp (including Crinoid Shrimp)
- Lionfish
- Snake Eels
- Sea Moths
- Nudibranchs
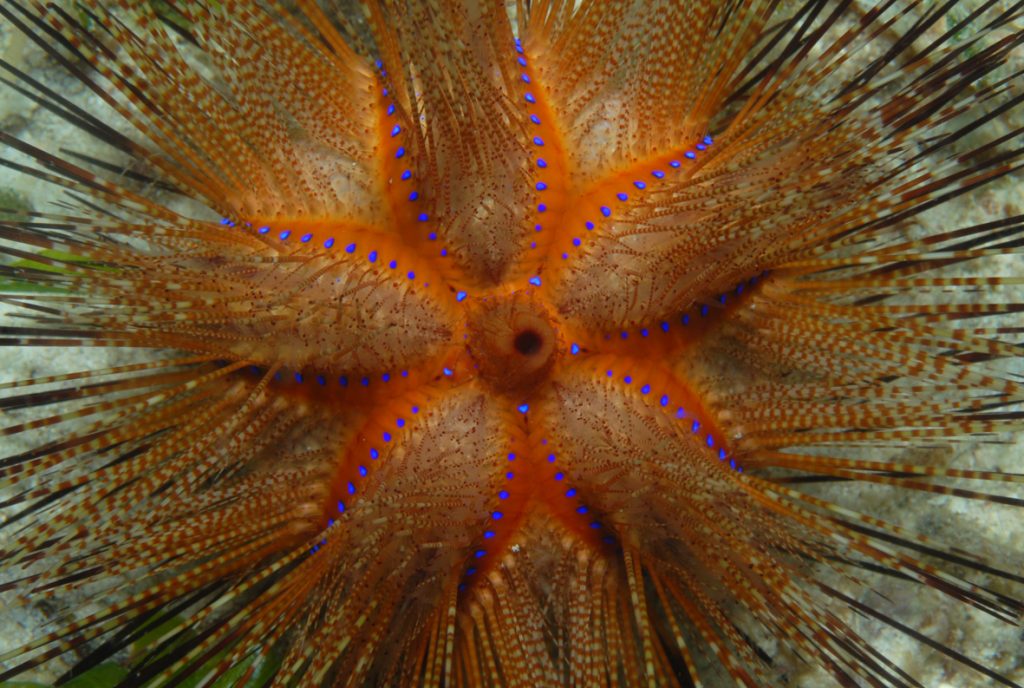
- Sea Urchins
- Numerous species of Corals & Sponges
Underwater Photography Equipment For Malapascua
Malapascua Island offers a wide range of underwater imaging possibilities, so photographers should ideally be set-up for both wide angle and macro photography. Take everything you’ve got, basically.
Compacts
Though I don’t use a compact camera myself, compact users should ideally be equipped with a strobe for the macro life. Additionally, a wide-angle wet lens with a dome port is a good addition for wide-angle images of corals, sponges, walls, mantas and thresher sharks, as the lens will allow you to get closer to the subject.
DSLR’s
At Malapascua, a digital SLR user will find uses for a variety of lenses, from macro to fish eye.
- A macro lens, such as a 105 mm is ideal for small fish portraits, seahorses, invertebrates and basically anything small that is wary and skittish.
- A macro lens in the 60mm range is ideal for larger fish portraits like frogfish and scorpionfish.
- For photographers wanting to work on “super macro” techniques using teleconverters combined with macro lenses, the sheltered and current free muck diving sites will provide a good environment for this.
- A wide angle zoom lens such as a 12-24mm is a good choice for the Thresher Shark dives, as the sharks may not come close to the divers.
- A fisheye lens for the underwater scenery images, split levels, the thresher shark and manta encounters if they come close, and the “wide angle close up” type images of subjects such as soft coral, white tip reef sharks or cuttlefish.
Camera Bag (Compact Camera)
Must bring –
Strongly recommended –
- At least one strobe
Optional-
- Wide angle wet lens
Camera Bag (DSLR)
Must bring –
- Camera
- Housing
- Strobe(s)
- Macro port
- Dome Port
- Macro Lens
- Fisheye Wide-Angle Lens
Strongly Recommended –
- Malapascua is off the “beaten track” so it’s essential that you bring everything you need, as it’s highly improbable that a “missing” item can be sourced from anywhere in the area. Make sure that you take spare batteries, “O” ring grease, plugpoint converters, chargers and so on. In order to ensure that I don’t forget anything, I have a “photography trip” packing list.
Malapascua Underwater Photography Tips & Techniques
In a general sense, successful underwater photography cannot be achieved by just being comfortable in the water and possessing knowledge of f-stops and shutter speeds, important though it is. It’s really the overall approach to the activity that can make or break the success of a photographer’s work. I learned some time ago (and am still learning!) that “getting the picture is the result of many things leading up to it.”
Avoiding “mental clutter” and diver stress is also extremely important for successful underwater photography. Correct weighting and comfortable dive equipment can help tremendously as can the camera itself, which should ideally be balanced and “neutrally bouyant” or at least comfortable in the hands of the user.
There’s often a huge amount of effort and/or expense required before a single underwater image can be taken. Simply put, it might involve researching a dive destination such as Malapascua Island, a plane journey, a transfer, a boat trip to a special dive site, a once in a lifetime encounter only to find that you didn’t charge your strobe properly or you left the lens cap on the camera. Or perhaps you had the wrong type of lens for the subjects you encountered. It then becomes a very expensive waste of time. So, it’s easy to see the benefits of good organisation and preparation. But in practical terms, what kind of preparation is required?
Research into the dive sites to be visited is a useful addition to the all important dive briefing itself. Knowledge of what to expect will influence the set up that the photographer chooses and is pivotal to the end result. With the knowledge of where you will be diving and what may be encountered there, the photographer can prepare his/her camera equipment the night before and have time to solve any technical glitches he/she may come across.
The importance of the dive briefings themselves should not be underestimated and is a crucial step in locating the required subjects. Following it will be much more likely to bring in good results. The diver who didn’t listen may miss some or all of the best spots – perhaps an overhang festooned with coral or gorgonians.
Learning about the behaviour of a subject is also an important and often overlooked aspect of underwater photography. Why try to photograph lionfish at midday when they are more likely to be active during the late afternoon or dusk?
These generalisations are, I think, especially valid for a varied dive destination such as Malapascua, where it really is important to be prepared for each dive site and the subjects that will most likely be encountered there.
As many divers visit Malapascua for the chance to see Thresher Sharks, I’ll start with the challenges of photographing these rarely seen and unusual sharks;
- The Thresher Shark sightings are most reliable at first light, which means a very early start, often requiring a 04.45am meeting at the dive centre for a prompt 05.00am departure to Monad Shoal. It goes without saying that a photographer must prepare his equipment the evening before.
- Local marine conservation rules don’t allow the use of strobes on the Thresher dives, as there are concerns that excessive “flashing” will frighten the sharks and alter their natural behaviour. It therefore means that all photographers can only work with ambient (natural) light.
- At first light (at around 05.00 – 05.30am), there’s very little light underwater which means that DSLR users like myself had to think about settings in advance of the dive. I set the ISO to 1600 and performed some test shots at the beginning of the dive – I found that f5.6 gave a shutter speed of around 1/45th to 1/60th – enough to freeze the movement.
- Though I realise that the majority photographer’s don’t have the option of two camera rigs like myself, I opted to take both cameras on the dives, after finding the fish eye lens wholly unsuitable on my initial Thresher dive (unless you get a really close pass) – yes, we saw them but for photography they were too far away.
- I decided continue taking the fish eye in the event of a close encounter, but also take the 12-24mm wide angle zoom, which didn’t require me to be quite as close. My dive guide would carry the camera I wasn’t using, and I would stay very close to him if we encountered a Thresher, in case I wanted to swap.
- Though we saw the Threshers on each of the dives at Monad Shoal, getting really close is quite difficult, though sometimes it is possible. I didn’t get any really close encounters, but managed to capture a couple of images that probably represented the best that could have been done given the circumstances I was faced with. The decision to take the 12-24mm lens on the dive made the difference between capturing an “acceptable” image and not getting anything that I could use.
At Gato Island, there’s some spectacular underwater scenery for wide angle/fish eye photographers, though the time of day, current and visibility can make a big difference to what is ultimately possible. I did a single trip there, which is a 45 minute boat trip from Malapascua. Each trip usually allows two dives at the island. Here’s a few thoughts on the photography aspects;
- There’s a spectacular cave that cuts directly through the island, linking one side with the other. I felt as though I only started to scratch the surface of the potential here as I spent part of a single dive there, but look out for interesting vistas from inside the cave entrances looking out. Perhaps frame a subject in the foreground, light it with the strobe and balance against the blue water. Alternatively, try working with a dive guide or your buddy as a model, making sure that their position in the water is complimentary to the overall image. Develop hand signals to communicate underwater.
- Try the concept of “re-shooting”. It’s incredibly simple and very effective – a visit to a dive site, take pictures, study the results and then return to the same place to re-shoot the image/s again, but better. It’s a technique that is particularly suitable for wide-angle “underwater scenery” photography. It is, of course, not possible to practice it with “one-off” encounters such as a passing manta ray or shark.
- There’s always a chance of some encounters around Gato, with a population of white tip reef sharks, cuttlefish and other surprises making good subjects. During my visit the most of the white tips weren’t “at home” but we did find a pair nestling in a very small cave, which was very difficult for photography. We also discovered a couple of large cuttlefish on the slopes at about 20 metres, but they weren’t keen on close approaches. In general, when approaching skittish subjects, it’s always a good idea to circle slowly round and approach from the front, rather than “chase” from behind, trying not to rush and keeping the breathing under control.
- At Gato Island, and other dive sites in the Malapascua area, there’s some spectacular areas of soft coral. These proliferations tend to happen where the current runs, so it’s often difficult to remain in a place to shoot images. These current prone areas are also tricky as the water tends to carry a lot of particles, reducing the visibility dramatically. If you get ideal conditions in these areas, make the most of it!
Malapascua is also a very good destination for macro subjects. Here’s a few thoughts on some of the subjects encountered;
- Many macro subjects are difficult to find, so it’s a very good idea to seek out a good local dive guide.
- The sand colour on the “muck” diving sites is quite light, so care must be taken with strobe powers if shooting subjects on the sand.
- Discuss with the dive guide the best subjects for each dive site, so that you can maximise each location. For example, Pygmy Seahorses were the “unique subject” at Deep Rock, so I visited them first to spend a decent amount of time before moving on.
- Try to shoot subjects against non-cluttered backgrounds, therefore creating less distraction in the image. Try dark and light backgrounds by adjusting the shutter speed. Also, try the narrow depth of field “bokeh” effect – it’s quite tricky but rewarding if you get it right.
- Be patient. I spent half and hour working with my dive guide to get the mating Mandarinfish image.
As a general rule, it’s always a good idea to vary your shooting, perhaps making a conscious decision to shoot more images in the “portrait” format rather than the more comfortable and familiar “landscape” format.
Other items worthy of consideration;
- Check the weather – If it’s going to be rainy or overcast, it might be better to shoot macro. For example, save your fish eye split level images for a better day, when the sea is calm and the sun is out.
- Ask questions about the dive sites the day before, so that you can set up the camera/lens combination for the subjects you’ll likely encounter.
- Be discerning with the subjects and be prepared to move around to get the best angles.
- Consider both the foreground and the background in each image.
- If you’ve got your “stock” images in the bag, have a play around. For example, try panning and blurs.
Photo Techniques For Malapascua
To get the most out of your trip to Malapascua, please read the following guides from the Dive Photo Guide Technique Section before leaving.
Topside Excursions, Activities & Experiences
Malapascua is a small laid back island, with basic but adequate facilities. There are a few options for topside excursions, activities and experiences though they are somewhat limited.
- Sunset Booze Cruises (perfect for that “end of trip” celebration)
- A Full Day or Overnight Trip to Biliran Waterfalls, Volcano & Hot Springs
- There’s a series of paths around the island for those wishing to go for “a wander”.
- Try Lechon Baboy, a Spit Roasted Pig (a Cebu speciality) which can be arranged for groups with ample notice. This is normally reserved for Filipino birthdays and weddings.
- For “party animals” there’s also the chance of a “Full Moon” party somewhere on the island. Ask around to find out what’s going on.
Planning Your Underwater Photography Trip To Malapascua
When To Go: Malapascua offers year round diving. It was mostly calm during my stay in September, but many sites are still diveable if it gets windy.
May to December is the Typhoon season, though chances of being affected are statistically slim at any given time, with the majority of disruption tending to be further to the north.
Thresher Shark and Manta sightings happen all year round at Monad and Kimud. Mobula Rays are possible year round with a group of about 30 being sighted prior to my visit. Hammerhead sightings are most likely between December & May with April being the best month (usually at Kimud Shoal).
I was told that November has been historically good for Octopus mating. Sightings of Ghost Pipefish and other critters vary, though no particular timings can be “set in stone”.
How to Get There: As I was travelling from the UK, I was able to fly directly into Cebu City from Singapore with Silk Air thus avoiding Manila.
Other possible routes will almost certainly involve a change in Manila and include flights via Kuala Lumpur (Malaysia Airlines) and perhaps Hong Kong.
Once in Cebu City, it’s approximately 3.5 hours to the northern tip of Cebu by road and a 20 minute boat crossing to Malapascua. Thresher Shark Divers can organise a land and boat return transfer from/to Cebu City.
Entry Requirements: All visitors must have a valid passport and return ticket to enter the Philippines. No special visa is required for UK citizens. Whatever your nationality, it’s always a good idea to check in advance on the latest entry requirements.
Tipping: Tips are accepted for good service on Malapascua. Opinions differ among different nationalities as to what constitutes appropriate tipping, though 10-15% is usually considered to be generous.
At Thresher Shark Divers, you could either tip individuals such as your dive guide, and/or tip the dive centre staff in general by putting it in a designated tip box. Some restaurants may include a 10-15% gratuity, though the majority probably don’t.
Taxes: In the Philippines, there are various taxes, though I didn’t come close to understanding them during my time there! There is a departure tax for international travellers so it’s important to ensure that you’ve got enough currency left for the airport.
Connectivity: Thresher Shark Divers offer a reliable and (they say) fastest internet connection on the island.
I always found the mobile phone reception to be very good when ringing home on a couple of occasions.
ATM Access/Payments/Money Changing: There are no ATMs on Malapascua Island. The best idea is to obtain your necessary money requirements prior to leaving Cebu City airport. There is an ATM there but for some reason it didn’t “like” my credit card.
Thresher Shark Divers accept credit cards and can also change money subject to availability. Not all resorts on Malapascua accept credit cards, so it’s a good idea to check in advance.
Health Concerns and Vaccinations: The Philippines is located in the tropics, so it’s worth taking advice on the latest inoculations/vaccines and medication requirements/recommendations well in advance of a visit.
Drinking Water: There is no safe drinking water on Malapascua, but it’s easy to purchase bottled water and other drinks.
Emergencies: There is a medical centre/hospital and pharmacy in Maya, a town at the northern tip of Cebu. The nearest recompression chamber is in Cebu City about 3-4 hours by boat/road. Helicopter evacuation is “possible” in the event of serious emergencies.
Where to Stay: I dived with Thresher Shark Divers (www.thresherdivers.com) who arranged my accomodation at the small and secluded Tepanee Resort (www.tepanee.com).