An Underwater Photographers Guide
By Jeremy Cuff/www.ja-universe.com
Photographs by Jeremy & Amanda Cuff
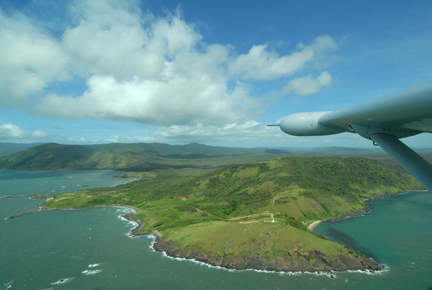
Whilst researching diving options for a visit to Eastern Australia, we discovered a variation on the normal dive trip theme – the “Fly Dive”. We wanted to visit some of the more remote areas of the Great Barrier Reef, so we joined a liveaboard in Cairns for the voyage north to Lizard Island, visiting Cod Hole and the Ribbon Reefs. We would then fly back to Cairns at low level…
Anybody who’s been abroad on a diving holiday has probably made that semi-anxious mental arithmetic at the end of the last dive. The dive computer says something like “do not fly for 14 hours” forcing your mind to immediately calculate how much time you’ve got until you fly home. Diving and flying are uneasy bedfellows.
However, in Australia, it’s possible to marry the two together. The trick is that the flights are at low level, so not only does it present no risk to nitrogen saturated divers, it also allows great viewing of the reefs, islands and coastline of northern Queensland.
Cairns based liveaboards offer shortened versions of longer itineraries, using the remote and exclusive resort of Lizard Island as the departure or arrival point. It’s ideal for divers who are unable to spend the whole week aboard (in our case!), or those who don’t want to spend the whole week aboard (not in our case!).
As we set off, the weather looked like a wet weekend in the English Channel rather than tropical Queensland. The first leg was to Norman Reef for a couple of late afternoon familiarisation dives at the Playground site.
Norman Reef is an area visited by the day boats from Cairns and isn’t the best diving on the Great Barrier Reef but there’s still plenty to see. Anything can show up, so it’s worth going in and having a look. On the second dive, we saw reef sharks and jacks feeding underneath the boat as rain pelted the surface waters. It was also good for getting into that all important “dive routine” of establishing your spot and stowage space, which is unique to each dive boat or dive centre.
After the “bonus dives” of the Playground, we headed north towards better diving. It’s an overnight voyage to the Ribbon Reefs and a chance to re-learn the “skill” of sleeping to the movement of the sea. It was quite rough, with a few cases of seasickness among the guests. It wasn’t the weather that we’d hoped for, but it was forecast to improve during our time on board.
We awoke bleary eyed to the announcement that we were at the “world famous” Cod Hole. It’s one of Australia’s best known dive sites and with this in mind, I half expected to see other dive boats converging on this one spot. But it was only us, so we had the place to ourselves. The weather was still windy, dull and threatening rain, but it wouldn’t stop the diving – we were going in.
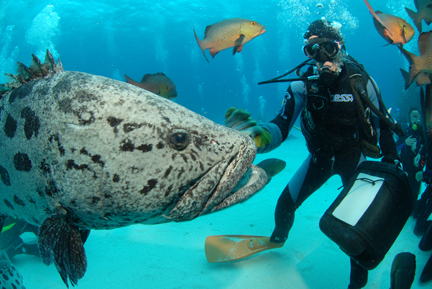
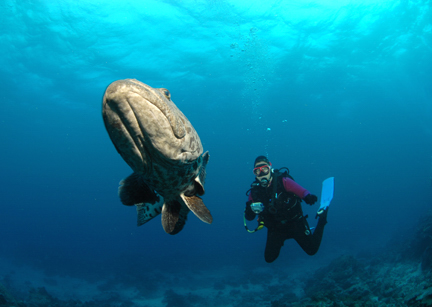
We enjoyed two dives at Cod Hole. On the first dive, we explored the reef itself, which is actually quite good. We encountered the gathering Potato Cod after which the site is named and there’s also the chance of other surprises such as turtles, rays and sharks. The topography consists of large bommies, a series of terraces and a large sandy “arena” in the shallower part of the site.
The second dive is the “cod feed” itself, which involves the crew luring these huge fish to the sandy “arena” with a holed container of “bait” – an irresistible concoction of dead fish and chum. Once in the water, the divers all assemble in a large circle on the sand and wait for the container to be brought past. Several large Potato Cod and other fish such as red bass remain glued to the container, transfixed by its contents. To add to the spectacle, the crew also hand feed the cod with fish. The dive is really good fun and great for photography.
Although the “cod feed” doesn’t quite have the same ring as “shark feed”, it doesn’t mean that sharks can’t attend the feed if they so desire. I noticed that at least one of the dive guides was on “shark lookout” during the feed, just in case the party was gatecrashed by something less friendly, like a tiger shark.
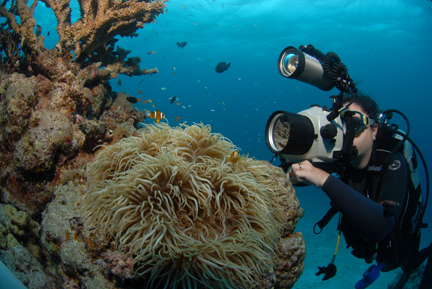
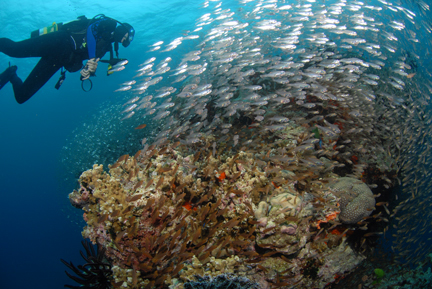
As we moved from site to site, we noticed that the underwater topography is quite varied, with each site seeming to have its own unique character. Everyone particularly enjoyed the two “pinnacle” dives at Lighthouse Bommie and Pixie Pinnacle. Here, there’s always plenty of action including the possibility of pelagics; we encountered several turtles, plus schools of jacks and barracuda. Other highlights included numerous anemones and attendant clownfish, pipefish, leaf scorpionfish and sea snakes which are seemingly unafraid of divers.
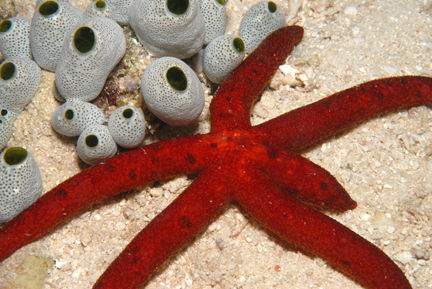
As a generalisation, all the reefs seemed to be in good condition, without any obvious signs of excessive coral bleaching that has happened in some areas of the Great Barrier Reef. There’s also some excellent swim-throughs and gulleys for underwater photographers to enjoy, particularly in the shallower areas of sites such as Stepping Stones and Pixie Gardens.
At the Challenger Bay site, we enjoyed a splendid encounter with a large cuttlefish. Far from retreating from us, this specimen was prepared to tolerate us as it propelled itself backwards and forwards, contorting its tentacles and blushing its mysterious colour change messages. We stayed with this fascinating creature for much of the dive.
Challenger Bay was also the site chosen for the night dive. As soon as we entered the water, we were followed by a group of hunting jacks. As we explored the reef, the jacks would zoom into the light to take any fish revealed by our dive lamps. At times, it was quite unsettling and at one stage I felt the snap of a jaw right next to my hand. It startled me and caused me to fear that I’d lost a finger. It took me a few seconds to have the courage to look! It was still there.
In calmer moments, there was plenty to see as the reef’s night shift went work. Moray eels ventured out from their day time retreats to hunt on the open reef whilst hermit crabs, sea cucumbers, starfish and countless shrimp were also active.
Our last dive was at Dynamite Pass, and we would do it slightly differently. Instead of jumping off the dive deck, one of the tenders dropped us up-current of the Spirit of Freedom, so that we could enjoy a drift dive back along the reef edge. It’s a nice site with the possibility of bigger stuff out in the blue and impressive coral formations interspersed with occasional sandy expanses, which are home to resting white tip reef sharks and rays.
We spent the last night moored in the shelter of Lizard Island, its dark shape discernable in the moonlight, as jacks skimmed through the water, hunting baitfish in the lights of the boat.
Next morning, instead of unloading at the jetty as is the norm with most liveaboards, we said farewell to the crew and any divers staying onboard for the second leg and boarded a tender, hopping onto the beach at Watson’s Bay on Lizard Island. As well as being home to an exclusive resort, Lizard Island is also a national park, and we were given a short walking tour whilst our gear was taken by tender to the tiny airport.
All too soon, arriving divers for the second leg of the voyage were disembarking the light planes and heading for the Spirit of Freedom for the journey out to Osprey Reef in the Coral Sea. We exchanged a few words with them, squeezed into our seats and prepared for take off.
The flight back to Cairns affords some great views of this remote and relatively pristine coastline, giving us a different experience with which to finish the trip. Within an hour and a half, we were back in our rented apartment in Cairns.